PROCEDURAL WORKFLOW APPROACHES
The best way to explore a procedural workflow approach is to actually start with a non-procedural one, and then compare the two.
We will start with a simple example that will 1) introduce basic 3D modeling workflows, 2) expose some of the basic Houdini nodes and 3) allow for a side-to-side comparison between the two approaches.
Let’s go back to our IKEA’s Billy(tm) bookcase as an example:

Start a new scene in Maya and create a default cube.
- Rename pCube1 to bookcase
- We’ll use the Billy bookcase’s dimensions (80x28x106 cm) as a ratio reference and in the Channel Editor > Inputs, set the Width to 8, Height to 10, and Depth to 3
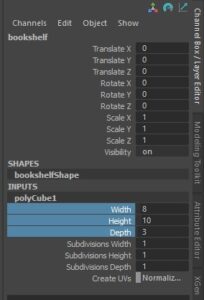
- Set the Subdivisions Height to 3
- Switch to the Modeling Toolkit
- Select the three front faces
- Click on the Extrude tool in the Modeling Toolkit
- Set Keep Faces Together to Off (very important)
- Set Offset to 0.2
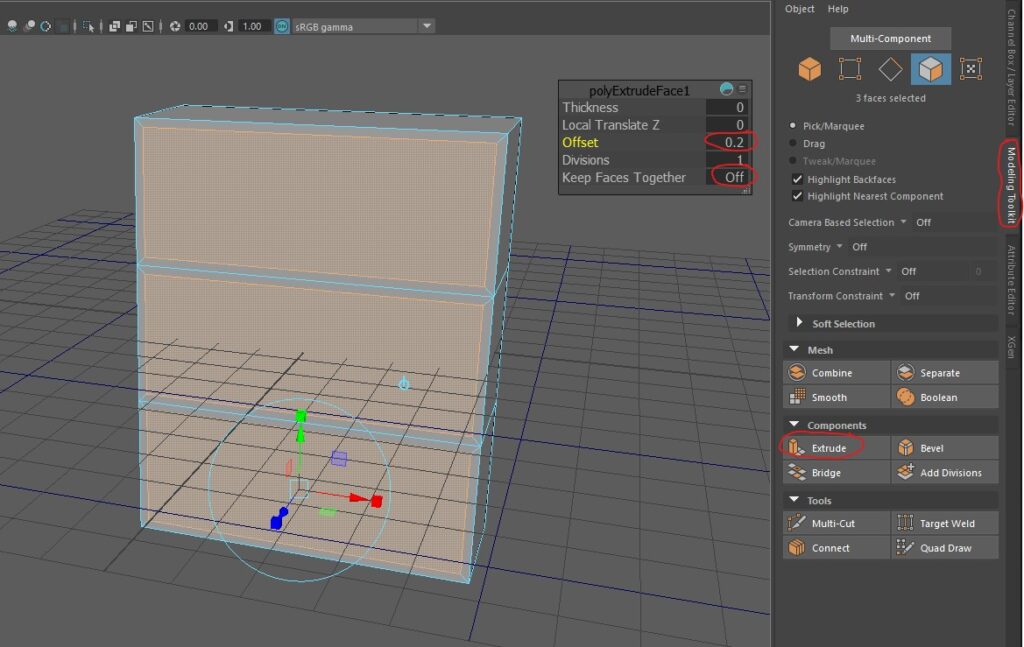
- Click out to deselect the tool
- Reselect the 3 faces, and enable the Move Tool (shorcut W)
- Hold down the Shift key. You’ll notice the word Extrude appear as you place your cursor on the axis arrows of the Move tool
- Click on the Z-axis (blue arrow) while holding on to Shift, and push it towards the back of the bookcase. This will duplicate the face and create an inset. This has the same effect as using the Local Translate Z in the Extrude tool
- Your bookcase should look like this:
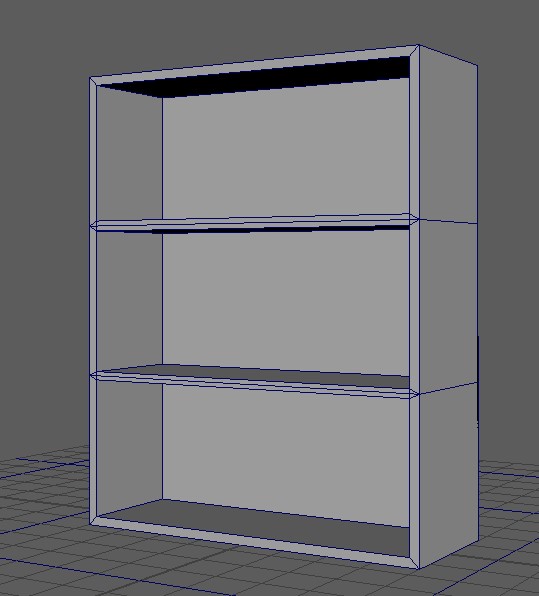
- For our purposes, this is good enough for the demo. But, if you’re picky you’ll notice that the middle shelf sections are twice the width of the top and bottom shelves.
BONUS QUESTION: How would you solve that? Share your solution in class.
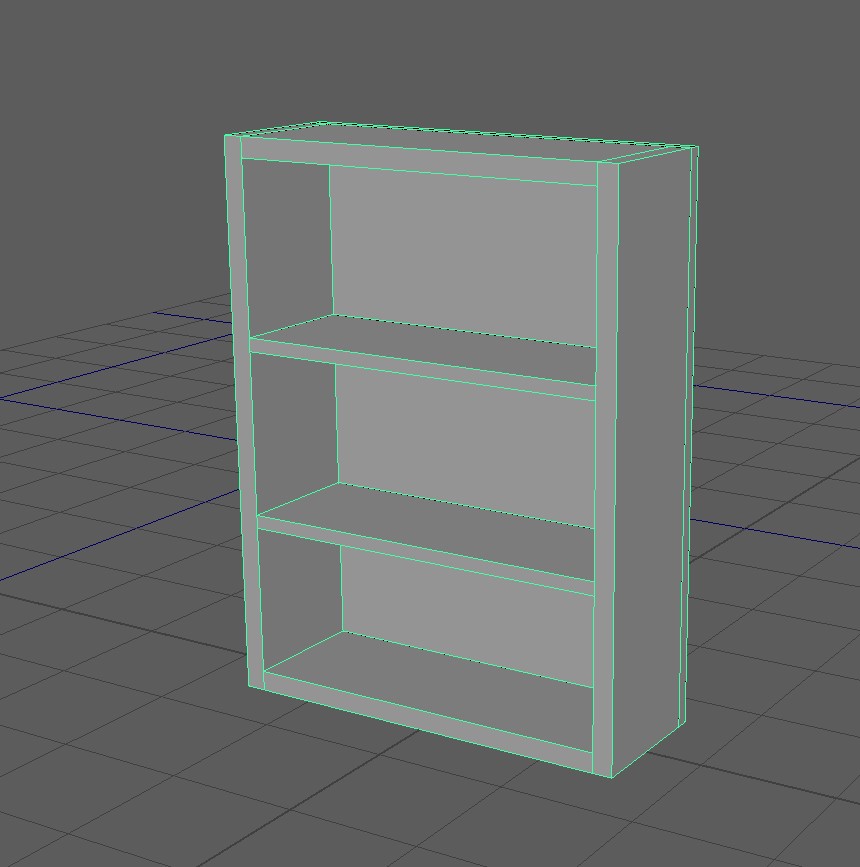
Here’s the final bookcase, Maya style.
HOUDINI WORKFLOW
This time, we will rebuild the bookcase using Houdini. The main difference will be that instead of building a specific bookcase (as referenced in the IKEA catalog image above), we will build the idea of one. This model will meet the parameters of a bookcase i.e. rectangular frame, space for shelves, open front and a backing.
One of Houdini’s strengths is the ability to have one node manipulate another in order to achieve complex results. This is done oftentimes with the use of expressions.
Expressions are small, code-like bits that tell Houdini to execute a specific command or a set of instructions.
COPY/PASTE PARAMETERS
A common use of expressions is to copy a specific parameter from the controlling node, and paste it onto the controlled parameter of another.
In the example below, I created a Line node and a Box node. We will use the length parameter of the Line node to control the Size X of the Box.

BBOX
One of the most useful Houdini expressions you will use is bbox (and I don’t mean beat-boxing…).
The bbox expression deals with the bounding box of an object. A bounding box is an imaginary box that surrounds an object on all 6 sides. The boundaries of the bounding box are defined by the nearest and furthest edges of the 3D mesh on each individual axis.
Here’s an example using Houdini’s rubber toy model:
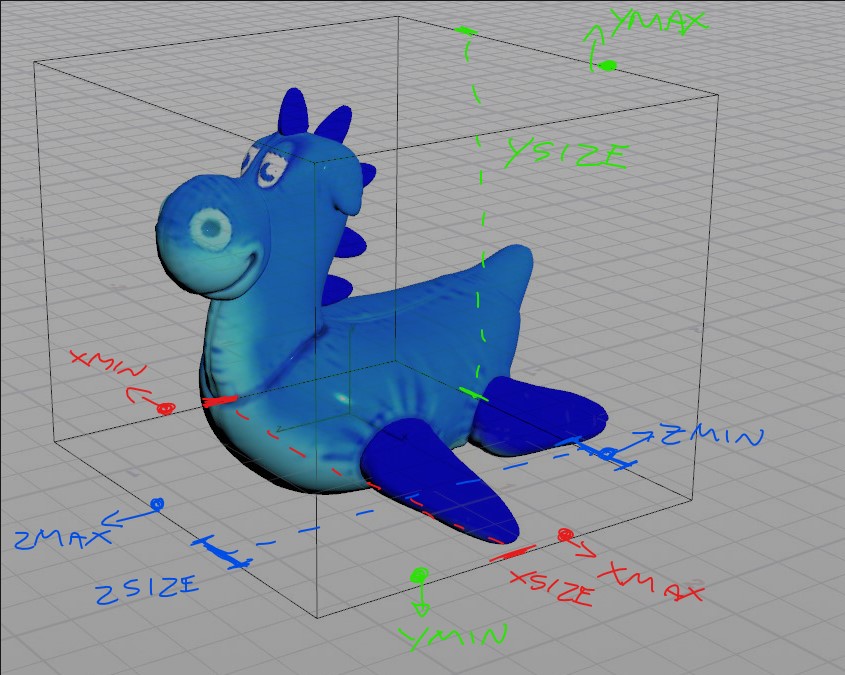
The box surrounding the rubber toy represents the bounding box.
The bbox expression has parameters which define 1) which side of the bounding box to invoke and 2) the overall dimensions of the bounding box.
These parameters (types) are: XMIN, XMAX, YMIN, YMAX,ZMIN, ZMAX, XSIZE, YSIZE and ZSIZE.
The expression is written in the following manner:
bbox(surface_node, type)
In the tutorial videos, we will explore use of the bbox expression as we build our bookshelf, and you’ll quickly see its usefulness.
COURSEWORK
Watch and follow along the exercise in the videos posted.
Save your Houdini bookcase file and refer to it as needed. We will use these concepts for our next assignment.