SETTING UP MATERIAL IDS FOR UNREAL 4
There are a couple of ways of setting up Material IDs for 3D meshes, to be brought into Substance Painter and ultimately exported to the Unreal Engine.
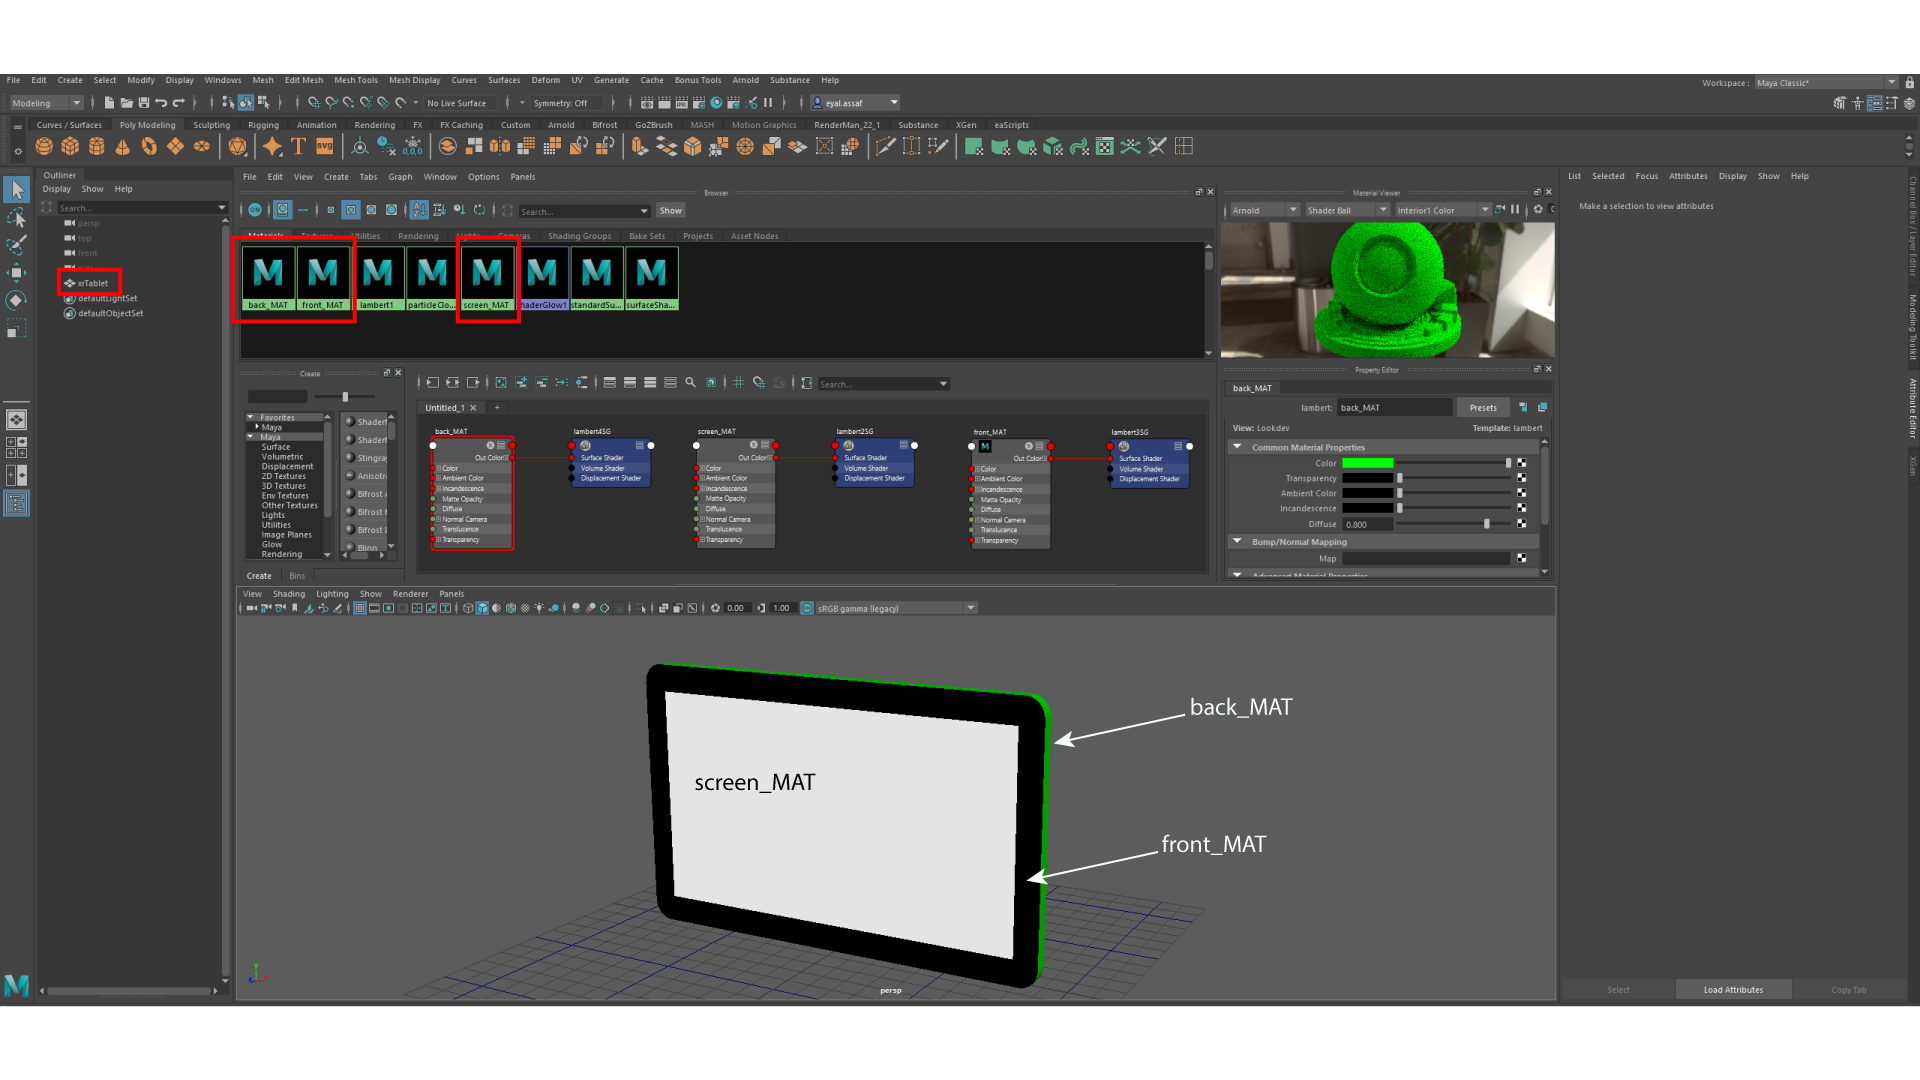
The most straightforward way is illustrated in the image below:
In this example, the mesh (a single object called xrTablet) has 3 separate materials applied to selected faces. One material for the screen, one for the front and one for the back. The colours are unimportant.
When exporting this file as a single FBX, bringing it to Substance Painter and baking the ID Mesh Map, we get three Texture Set Lists:

When exporting the textures out of Substance Painter, using the Unreal Engine 4 (packed) Output Template, we get 4 texture maps perTexture Set List. Not exactly what we want.
USING VERTEX COLOR
The ideal option in this case would be to use a single material and implement Vertex Colors on the poly faces. This will create a single Texture Set List and allow to select the Material IDs from it.
By the way, you can use a Cube to test this out.
There is a bit of a setup involved. Follow the steps below to set it up.
- Make sure the UVs of the mesh – even if it’s initially made up of multiple parts – are all within a single UV space. Arrange the UV shells properly, using Texel density and maximize the areas that will require the highest resolution.

- Combine the mesh if necessary, again double-checking the UVs are not overlapping.
- Ensure that a single material is assigned to the mesh. You can use either Maya’s default Lambert1 or standardSurface1. Makes no difference at this point.

- Select the faces you want to apply the vertext colors. In this example, I’m starting with the screen.

- In the Modeling module, go to Mesh Display > Apply Color > Option Box

- From the Apply Color Options menu, pick any color from the color swatch, and click on the Apply button.

- Rinse and repeat for all other faces.
NOTE:If you want certain areas to have the same texture set applied, use the same colors! - This is the final vertex color setup:

- Export as an FBX file. You only need the geometry options, nothing else for this stage i.e. animation, lighting, camera, etc.
SUBSTANCE PAINTER WORKLOW
The ideal option in this case would be to use a single material and implement Vertex Colors on the poly faces. This will create a single Texture Set List and allow to select the Material IDs from it.
- In Substance Painter, start a new project and use either the PBR – Metallic Roughness (allegorithmic). If you have any transparencies that are required, use PBR – Metallic Roughness Alpha-blend (allegorithmic).
- Load the .FBX mesh with the single material saved above and set Document resolution to 2048 or 4096 and click OK.
- The mesh should load up with only a single Texture Set

- In the Texture Set Settings, click on the Bake Mesh Maps button. Depending on the requirements, enable or disable the various maps you need. In our case, do make sure the ID map is selected and click on it to see the options.
- Change the Color Source to Vertex Color from the dropdown menu and click on Bake Selected Textures.

- Once the maps are baked, you can see them by changing the viewport dropdown to ID. Make sure to switch back to Material when you’re done.

- To apply materials to each Material ID, a mask with color selection has to be used. For example, I’ll use a blue plastic material for the back.
Drag and drop the selected material in the Layers tab. You can delete Layer 1. You should see the whole mesh assigned with the selected shader.
- Select Add a mask with Color Selection from the Add Mask dropdown menu.

- In the Mask > Color Selection properties, click on the eyedropper (Pick Color) button.

- Once you pick the right color, the material will be assigned only to that ID. For this example, I picked the back of the tablet and the blue plastic material is now only on those faces.

- Repeat for all Material IDs in your mesh. Each material used should have its own ID assigned to it.
- When done, go to File > Export Textures…
- Select the Unreal Engine 4 (packed) Output Template and click on the Export button. Everything now should be under 4 texture maps.


